


sábado, janeiro 19, 2019

Before continuing... Make a backup from your Paint Tool Sai directory and the all files included. Because if you get an error or somethin went wrong, you'll can realocate the old files and use your first version of the software, the original.
Any doubt?? Contate-nos!
http://saibrasil.blogspot.com.br/2014/02/contato.html
Method 1
1 - Download de archive .zip
2 - Unzip the file .bmp and put it on the "blotmap" folder.
3 - Localize the executable "start-sai.exe" and double-click on it. Done!
4 -You can create from this executable a desktop shortcut. For that, go to the executable, click with the right button on it, choose "create a desktop shortcut" and you will see the icon on your desktop.
Método 2
Textures
1 - First of all, close the SAI and unzip the "Brushes.zip" file that includes all the brushes.
2- Copy the following files (pic down below) to the folder called "Brushtex" (Generally located in "C:/Arquivos de Programas/ Paint Tool Sai/Brushtex)

3- Open the file "Brushtex"(In SAI folder) as an editable archive (generally in the Wordpad) and type like this bellow:
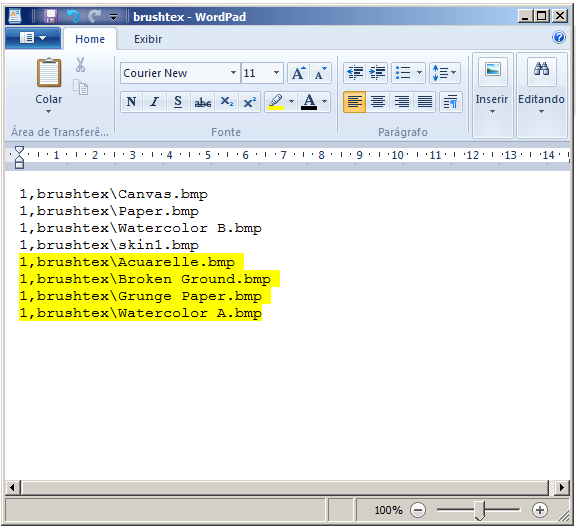
4 - Save the archive and open the SAI.


2- Copy the following files (pic down below) to the folder called "Brushtex" (Generally located in "C:/Arquivos de Programas/ Paint Tool Sai/Brushtex)
3- Open the file "Brushtex"(In SAI folder) as an editable archive (generally in the Wordpad) and type like this bellow:
4 - Save the archive and open the SAI.
The texture will be showed like this.
Done. Easy! Isn't?
Brushes Installation
1- In the same way, but the pencils (pic below) need to be copied in the elemap folder (Generally located on "C:/Programs and Folders/ Paint Tool Sai/elemap)
2- The archive which needs to be changed is called "Brushform". Rewriting like this:
Method 3
1. Open the Paint Tool SAI directory.
2. Open the file "NEWbrushform.conf" in text mode. Just right click the button and open it with the notepad windows .
3. In the document, copy all the lines and paste it on the same lines from into the "brushform.conf" original archive, in the Paint Tool Sai main folder .
4. Copy all the files to the "ELEMAP folder" and put them on the "elemap" folder in the Paint Tool Sai directory.
5. You will need to all the files to the "BLOTMAP folder" and put them on the "blotmap" folder.
6. Restart your system and you now all your new extentions will be ready for use!
Text and translation by: Thiago Henrique
Tutorials by: Thiago Henrique and the all PTSBR Community (PT-BR)
Tutorials by: Thiago Henrique and the all PTSBR Community (PT-BR)


Massa